App Features
Discover how Journey Pro simplifies your travel experience and enhances every step of your journey.
-
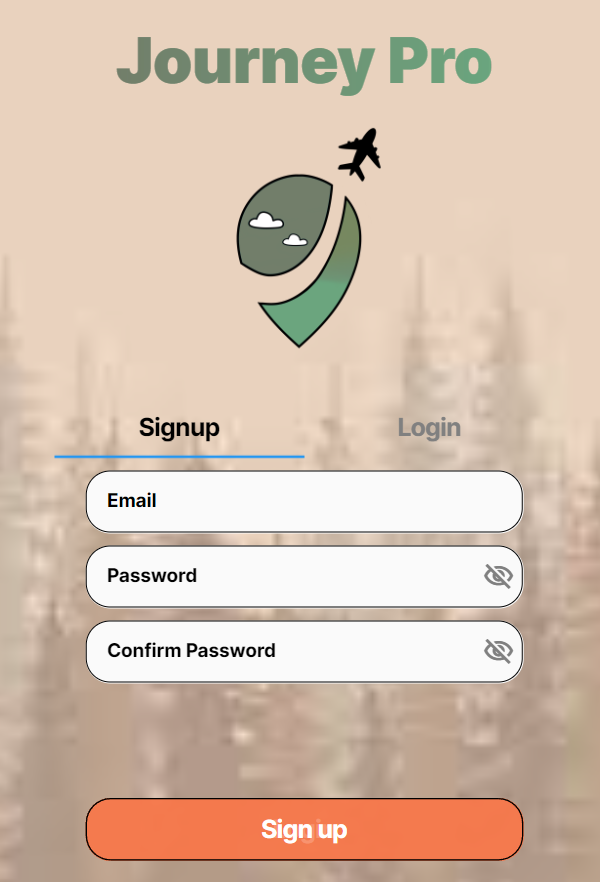
Login Page
This is the login/signup page and from here you can either click signup and create an account with us using a valid email and a valid password or if you do have an account with us you can click login and put in your accounts information to login.
-
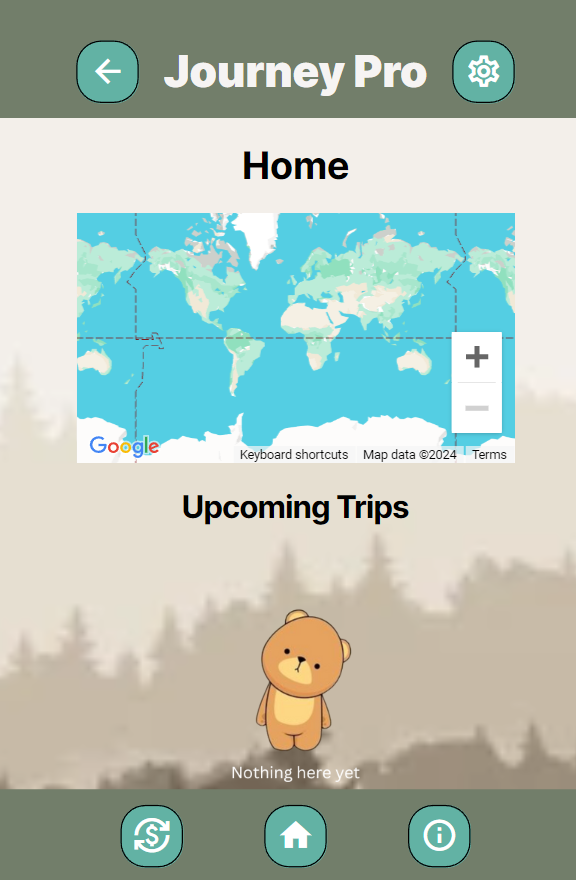
Empty Homepage
This is the homepage that greets you when you login it diplays your trips and a map that will put a marker on their location. Right now its looking a little empty so lets change that by clicking the Orange add trip button.
-
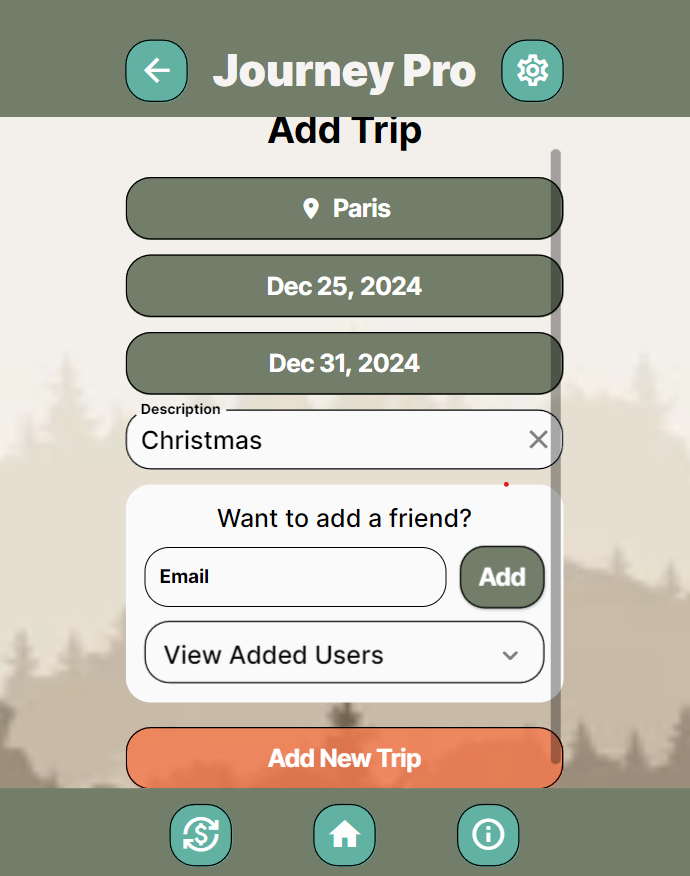
Add Trip
So in this you have a bunch of settings to add oyur tip for this one we will show Paris. When you click on the it you can search for a location to go. Once thats found set a start and end date for the trip. Write a little description and if you have people going with you and they have an account with Journey Pro add their email account to trip.
-
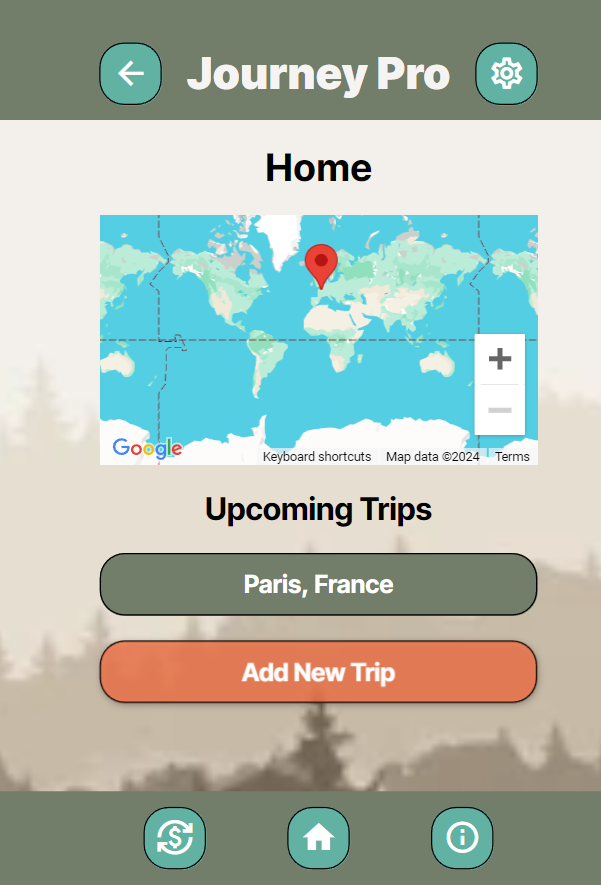
Populated Homepage
Thats better our homepage now has our trip and from this point we can click on the new green button that says the name of where you want to go.
-
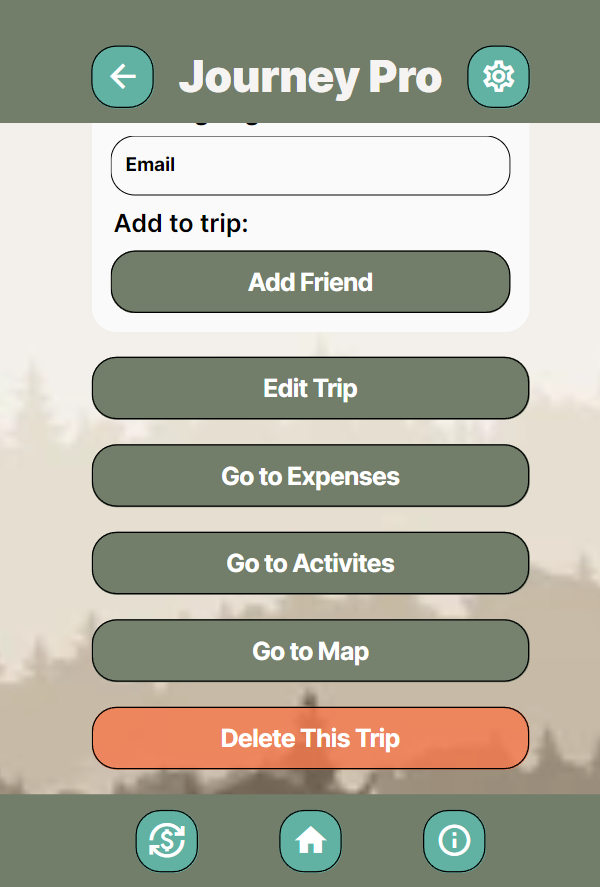
Trip Screen
Now we are in our trip screen and there are a lot of buttons dont worry we will go thorugh them.. Let start with the first button add friend that is the same as before where you put in email and add people to trip.. The next button edit trip will bring you to the same page as shown before that shows the start date and end date as well as the location and all of these can be changed. Lastly lets click on the Go To Expenses button.
-
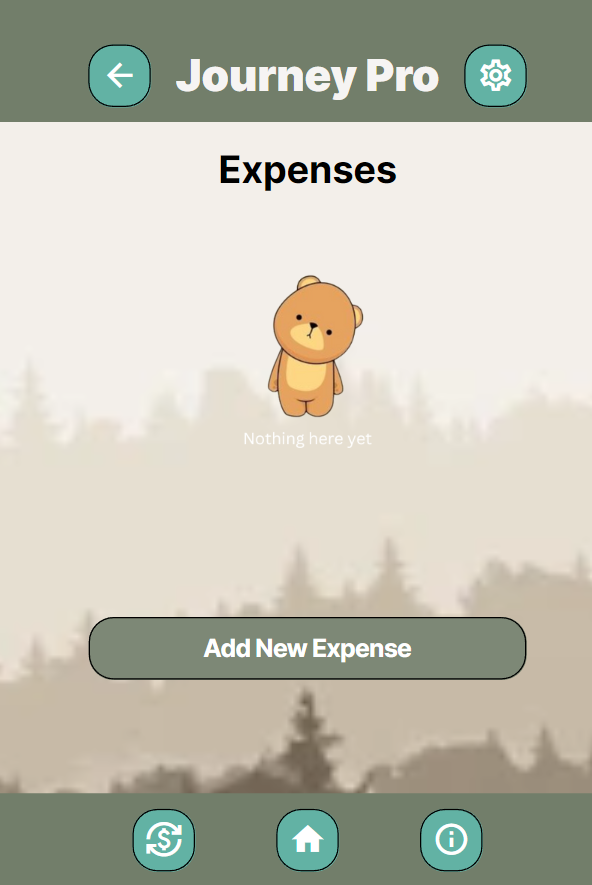
Empty Expense screen
Here you can ass expenses that are made throughout the trip for either keeping track of who owes money or even if you are just interested in how much money you spent. lets start by adding New Expense
-
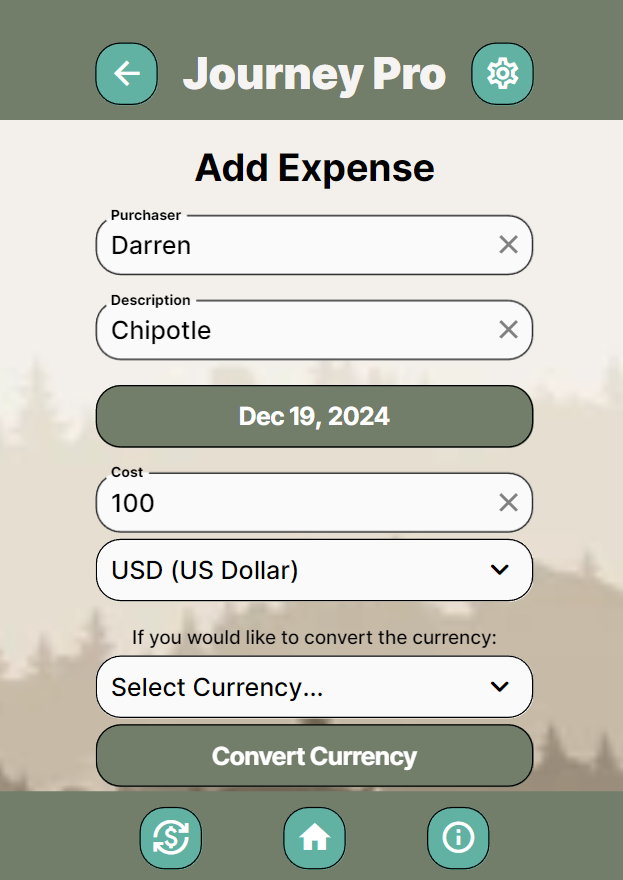
Expense Options
Now onto the add expense screen where we can add the purchaser, a description, a date, cost of expense and an auto currency converter built in. Finally at the botton you can add names as well as put a picture of the recipt. Just to finalize hit the add expense at bottom and it will show up on your expense screen.
-
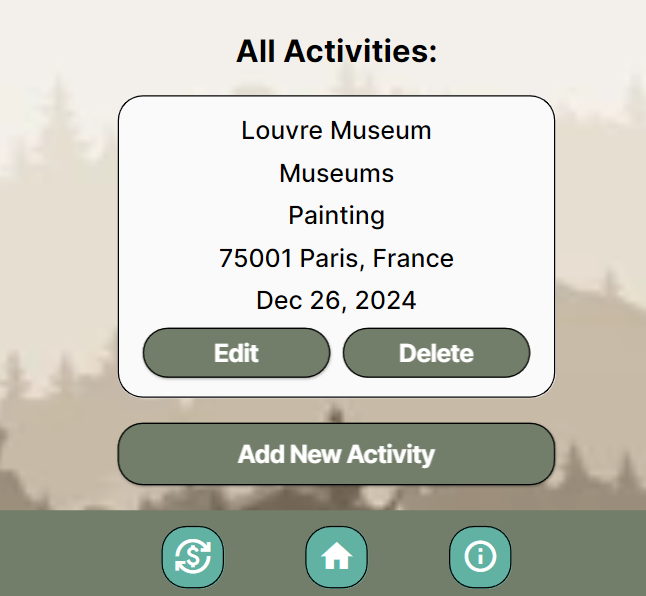
Empty activities
To get here you just need to click on the activities button in the trip card. Right now its looking bare but we jsut need to scroll down and click Add New Activity.
-
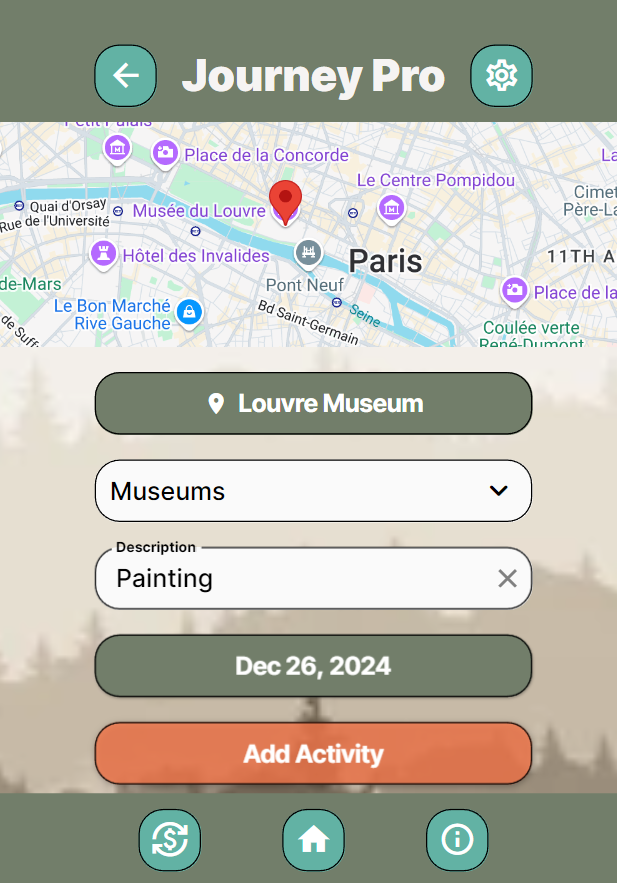
Making Activity
Now onto making an activity.. The map will automatically go to the area you had originally selected for the trip and you can look for palces through here or click the button to search. Once you find one you can give it a tag and add description before you add it as Activity.
-
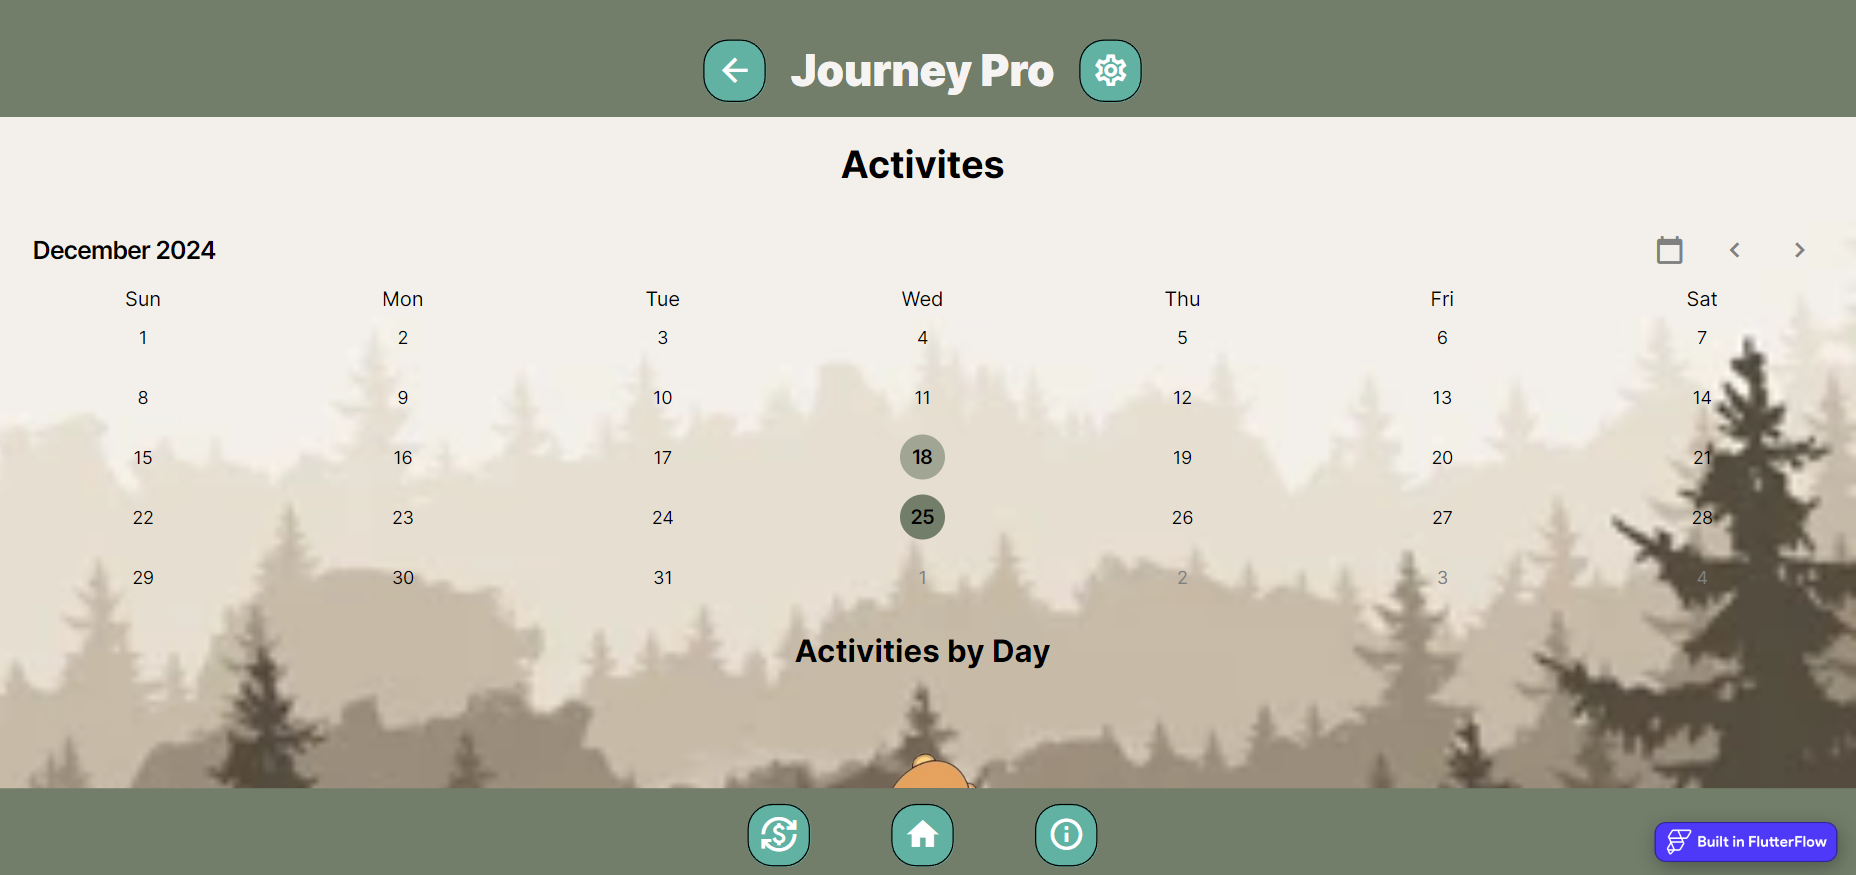
Added Activity
Now on this screen we have the activity you had just added and if you go to callender and click on the date of the activity it will show you ecerything for that date that is set.
-
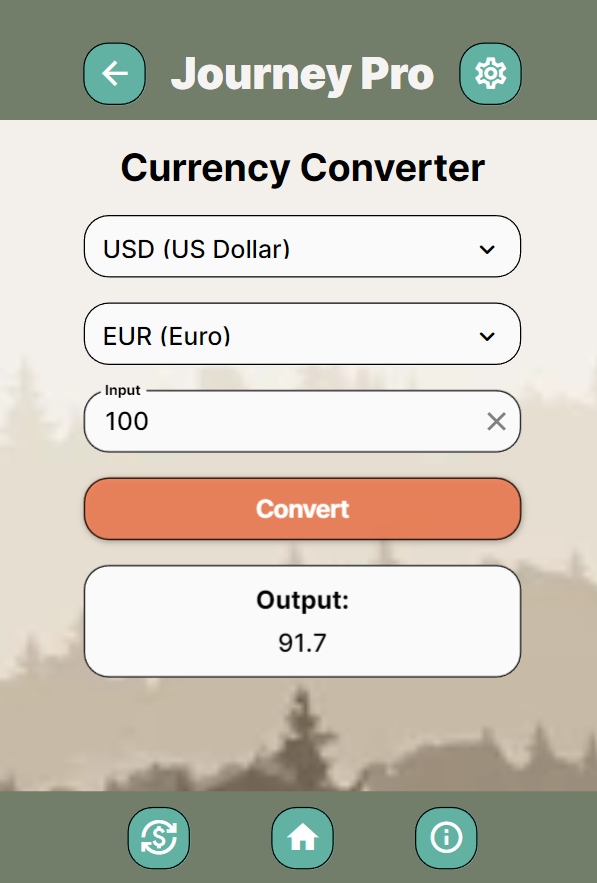
currency converter
Now to get here you need to click the bottom left button with the money sign. This is our currency converter and you can put in diffrent ammounts of money and translate them to other values. This is done by clicking the dropdowns selecting currencys and then puttin in a number to finish off with clicking convert.
-
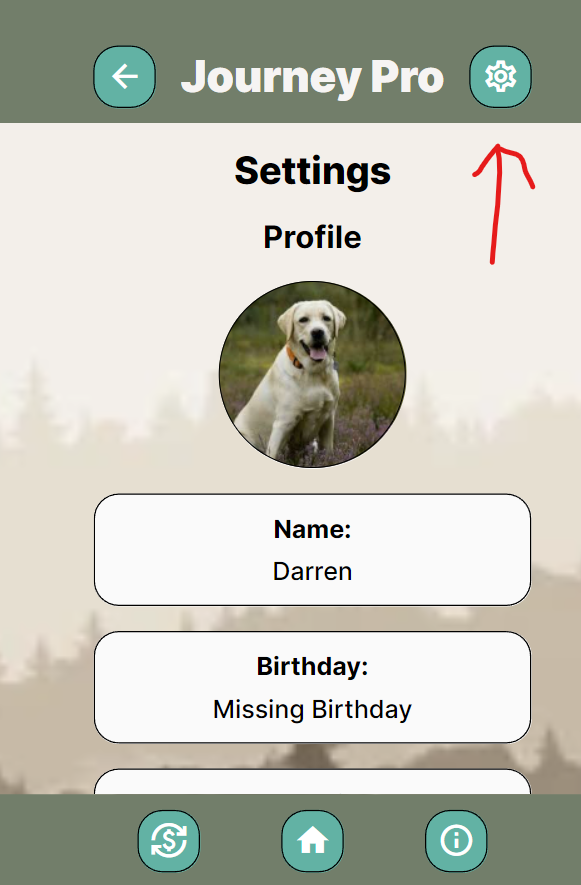
Profile Settings
To get to this screen follow the red arrow and click the setting button. Here we can edit profile stuff add a picture as well as your birthday and name.
-
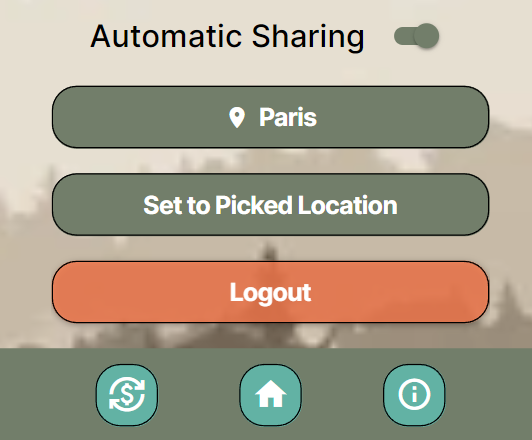
Location Settings
Now in this app you can turn on locaiton setting you can either have it automatically update while using the app or you can select a location. A cool way to use this is to select a location on where you plan to travel and set that as your location.
-
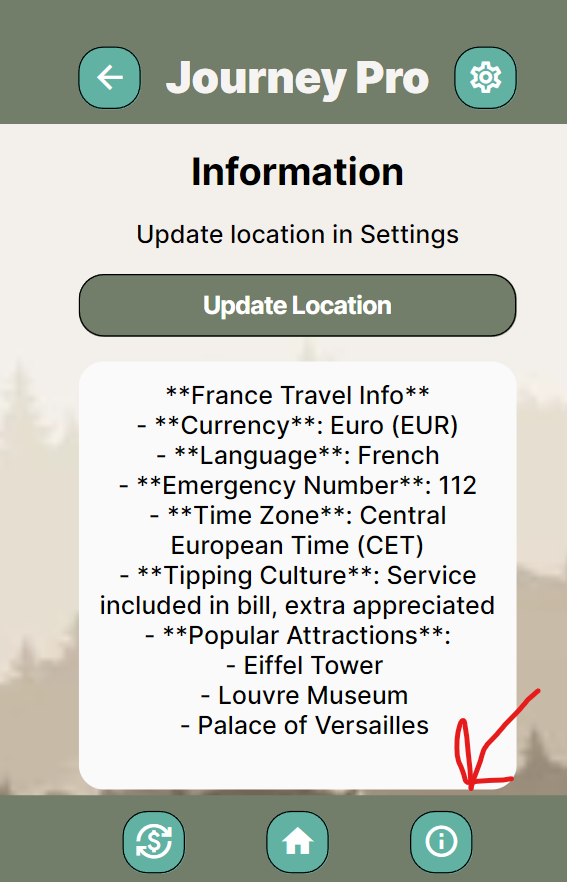
Profile Settings
Once that is set as your location click the bottom right button to get to the info screen here you can click update and it will show you information based on the location you have set. This part of the app is very early so some places may not appear that you search.